Over the past few years, I have reviewed several products here. I receive requests almost daily to review products or books. I have done my best to only showcase things here that I truly believe in, fit our overall ideas, and would be of benefit to our readers. THIS is one of those things.
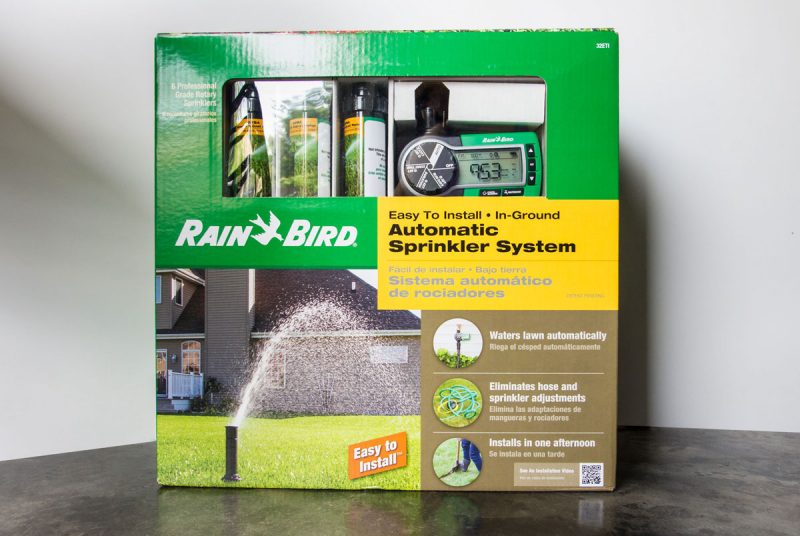
This is the Rain Bird Automatic Sprinkler System. I installed this yesterday. Seriously, the box says ‘installs in one afternoon’ and it is exactly right. The whole process took just a few hours… and I was making notes and taking photos along the way. It is really THAT easy.

What you get…
Fully automatic sprinkler system with timer (run by 2 AA batteries, not included) 6 sprinkler heads (covers 3000+ sq ft depending on your home’s water pressure), tubing and connections (includes extras for unusual situations) and everything else to make it happen (spikes, plumbing tape, cable ties, etc). It is an incredibly well-thought package making it ideal for DIYers.
The box comes with absolutely everything you will need except for a few tools. Here’s what I used from my house:
- a pair of scissors (to remove the strapping from the hose)
- pencil and clipboard
- tape measure
- trowel and hammer (to help dig out the trench for the tubing)
- pruning shears to cut the tubing
- work gloves
- flat edge shovel
- 2 AA batteries
What you do…
In hindsight, I probably would have knocked out some of the small tasks the night before like determining my gallons per minute (GPM), drawing my plan, placing the stakes, putting the battery in the timer and performing the initial set up of the timer.
You will have to do a little math to make sure you get full coverage, but the instructions make this very clear. The instructions include some sample layouts and graph paper for you to draw your own.
After the pre-work, the process is super simple…
- layout the stakes
- attach the timer to the faucet
- attach tubing to the timer and run it where it goes
- cut the tubing where the stakes are and attach connectors and sprinkler heads
- put sprinkler heads on the stakes with cable ties
- add drainage valves to ends of the tubing
- test the system and make adjustments
- dig a trench where the tubing and sprinkler heads will go
- place tubing and sprinkler head in the trench and bury
- make adjustments as necessary and set timer
You will find adjusting the length of the spray and the rotation of the heads is an easy task. Rain Bird has included the tool you will need to accomplish this. They have also included some replacement nozzles for a longer throw if your water pressure will support it.
All in all, I am very please with this product. It was a complete package and did just what it said it would do. It is available for the first time this summer and, as I understand it, will be under $200 at major retailers. That’s FAR less than you would pay to have someone install a system.
Note: I was not paid to review this product although I did receive the system free of charge to review. I was under no contractual obligation to post this review. It is here because it is a great product.


