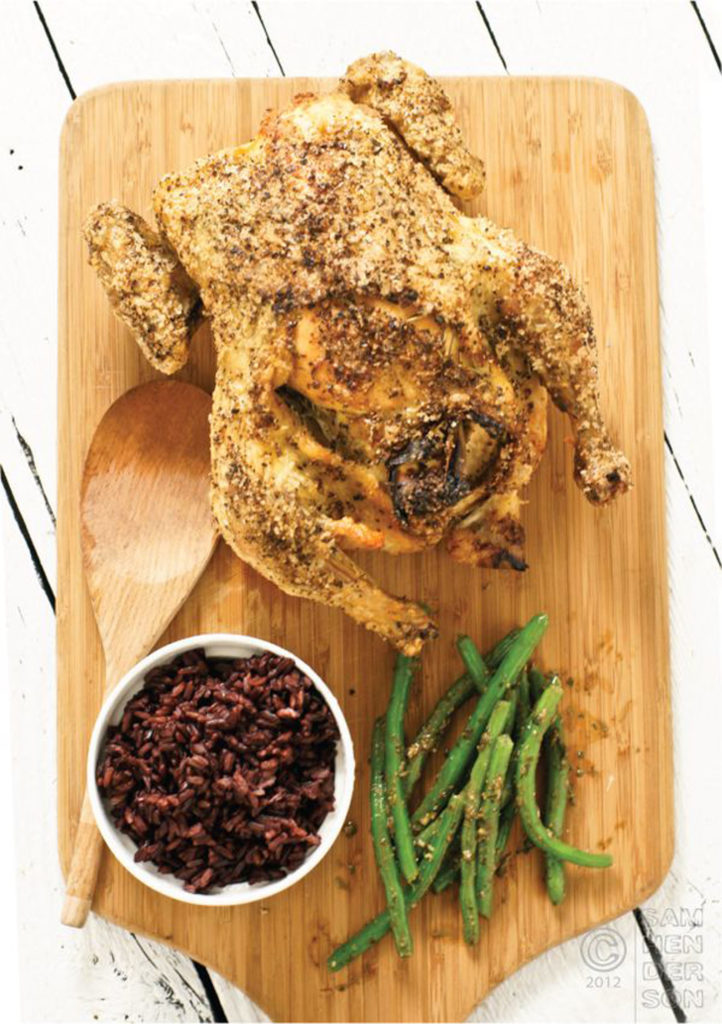
Another boring weekday meal…is that what you were thinking? Deciding on dinner can be tough. Despite our best planning efforts we, too, get in a rut. To make matters worse, throw chicken at it. Chicken winds up in lots of our meal planning as a source of protein. I am the only one who really likes seafood? I can sometimes get away with tuna steak, but that’s about it. Enter the chicken. Now, what to do with it? In a pinch, we have purchased rotisserie chickens from the supermarket to kick start our dinner, but if we have at least an hour we almost always roast it ourselves. Kitchen Basics: Roasting Chicken is the answer if you want a perfectly roasted chicken… made at home.
If you aren’t roasting chickens you are going to be amazed at how simple (and less expensive) it is. All you need for guaranteed success is a good chicken and a few essential tools. The preparation time is minimal and most of the time commitment is roasting time.
savour…home-cooked meals
ROASTING CHICKEN
Before you start:
It would be careless of me not to mention food safety. Be sure your work surfaces are clean and you wash your hands thoroughly after handling the chicken. I use the one-hand method… meaning I man-handle the chicken with my left hand while I add the spices with my right. It takes some time to get it down, but with practice, you’ll master it in no time. This prevents me from placing my chicken-covered hand back in the seasoning or all over the pepper grinder.
For heaven’s sake DO NOT DISCARD ANYTHING! Reserve the drippings and anything else left in the pan to add to the carcass when you’ve removed all the meat. Use all that goodness to make homemade chicken stock. No canned or boxed version compares to it.
For guaranteed success equip yourself with the following three things: a roasting pan, a wire roasting rack, and a meat thermometer.
The ingredients:
- Roasting chicken
- Salt
- Pepper
- Olive oil and/or butter
- Carrot
- Onion
- Celery
- Granny Smith apple (optional)
The method:
- Preheat oven to 425˚F.
- Cut up carrot, celery, onion, and apple into small pieces that will fit inside the cavity of the bird.
- Grind up some fresh pepper before you begin handling the bird. Place it in a small bowl.
- If you are adding any herbs such as rosemary now is the time to poke a few of those up under the skin randomly. Be sure to get some on the
breasts as they will be face up and the fats from the skin will help infuse the bird with flavor as it drips from top to bottom. - Wash your hands.
- Using your right hand drizzle olive oil or butter ALL over the bird.
Turn it with your left hand and then use your left hand to rub the oil
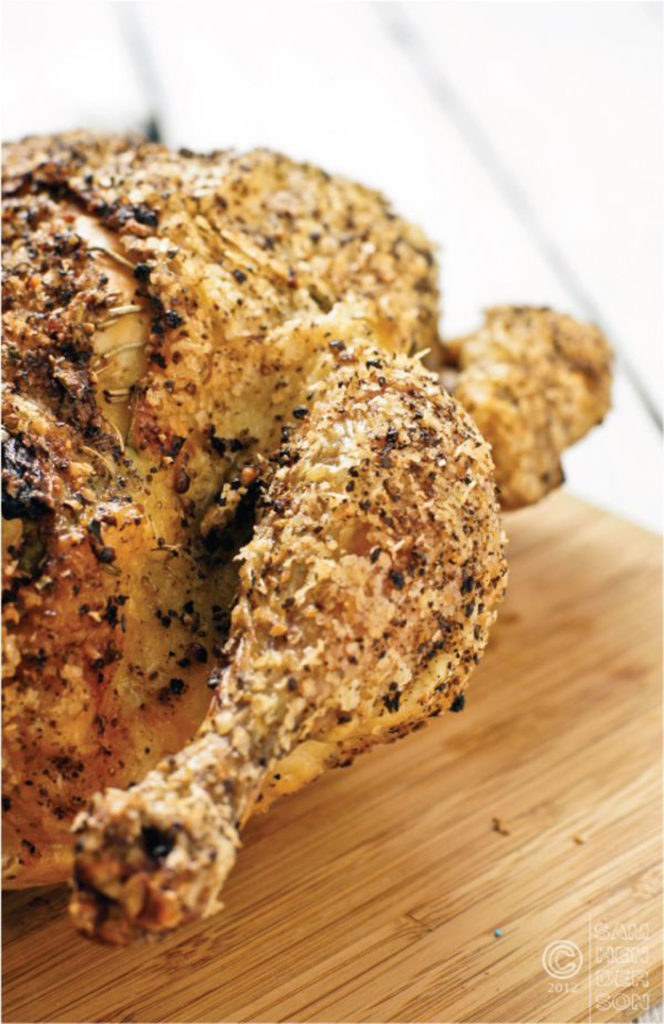
into all areas. - Again using your right hand, cover the entire bird with salt… plenty of salt. Rub it in with your left hand. Repeat with pepper.
- Place the bird on a clean surface and poke some of each of the vegetables into the cavity (you can use both hands now).
- Fold the wings under and place the bird on a wire roasting rack breast side up.
- Wash your hands.
- Insert your meat thermometer into the thickest part of the breast meat but not touching the bone.
- Place the rack in a roasting pan and toss any excess vegetables into the bottom.
- Place the roasting pan in the oven on a rack that is positioned to keep your bird at about the center of the oven.
- Roast at 425˚until the thermometer reaches 180˚ (time will vary based on the size of the bird).
- Remove from the oven and let stand for 10-15 minutes before removing the thermometer.
- Serve. Remove all remaining meat for additional meals.