Valentine’s Day is a perfect time to get crafty. For most a handmade greeting or gift would go a very long way. For kids it is perfect. With a few templates and simple craft materials, your kids could be well on their way to creating greeting card masterpieces.
For adults, it can still be fun. The tools and materials may be slightly more sophisticated, but the sentiment remains the same. Today we cover just a few Valentine’s Day options. We hope you will consider creating your Valentine by hand this year.
savour… sealed with a kiss
HANDMADE VALENTINES

Before you start:
Working with wire can be tricky. Wear work gloves if you think it is necessary.
I used simple floral wire, but this project could also be done with other wire for a different look.
To get the nails all the way through, you may have to hang one end over your board or place something underneath that will support the edges but allow the center to have nothing under it.
The materials:
For the felt heart:
- Stiff felt sheets in red, pink, and white
- Soft felt sheets in red, pink, and white
- Red thread
- Fabric glue
- Pinking sheers
- Hole punch
- Ribbon
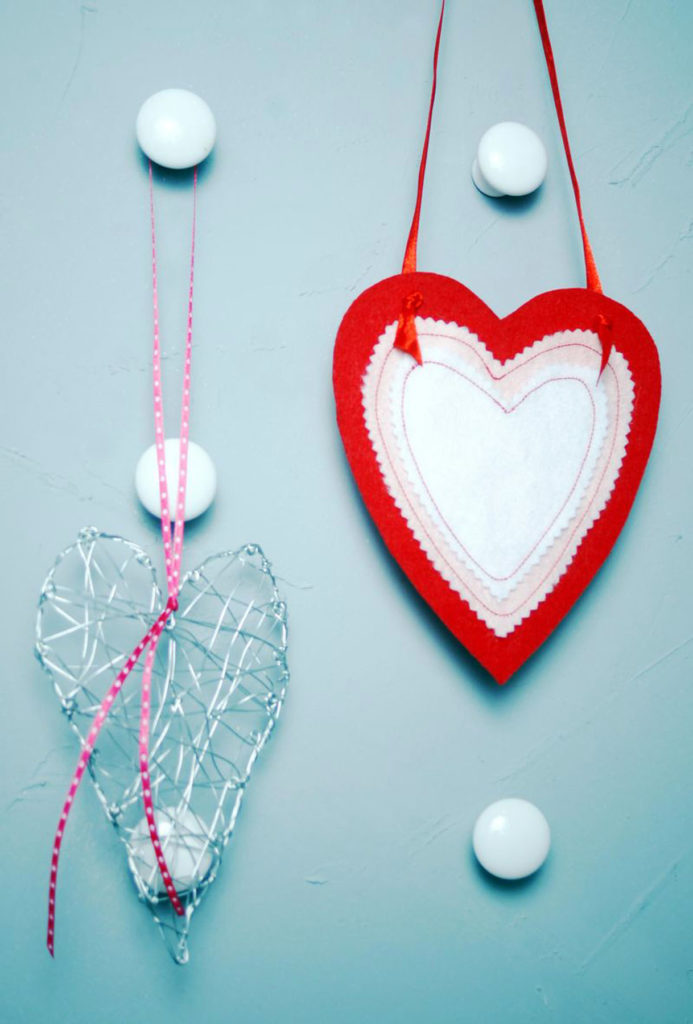
For the wire heart:
- Scrap board ¼ to ½ inch thick
- Permanent marker
- Nails (at least 1 inch long)
- Floral wire
- Nail
- Needle nose pliers
- Wire cutters
The steps:
For the felt heart:
- Using the attached template, outline the biggest hearts on the stiff felt.
- Outline medium and smallest hearts on the soft felt.
- Cut out the biggest heart with scissors or pinking shears.
- Cut out the medium and smallest hearts with pinking shears.
- If you wish to have a pocket, sew a red line around the perimeter of each heart.
- Glue them together medium to large, then small to medium. Apply the glue all the way up the sides of the heart, but do not glue completely.
- Without a pocket, sew the small heart to the medium heart. Then sew the medium heart to the large heart. Alternatively, to avoid stitches on the back of the project, you could sew around the medium heart and attach it to the large heart with fabric glue.
- Punch one hole in either side of the top of the large heart.
- Feed a ribbon through the holes.
- Tie a knot in the end of the ribbons at the desired length.
- Trim off the excess ribbon.
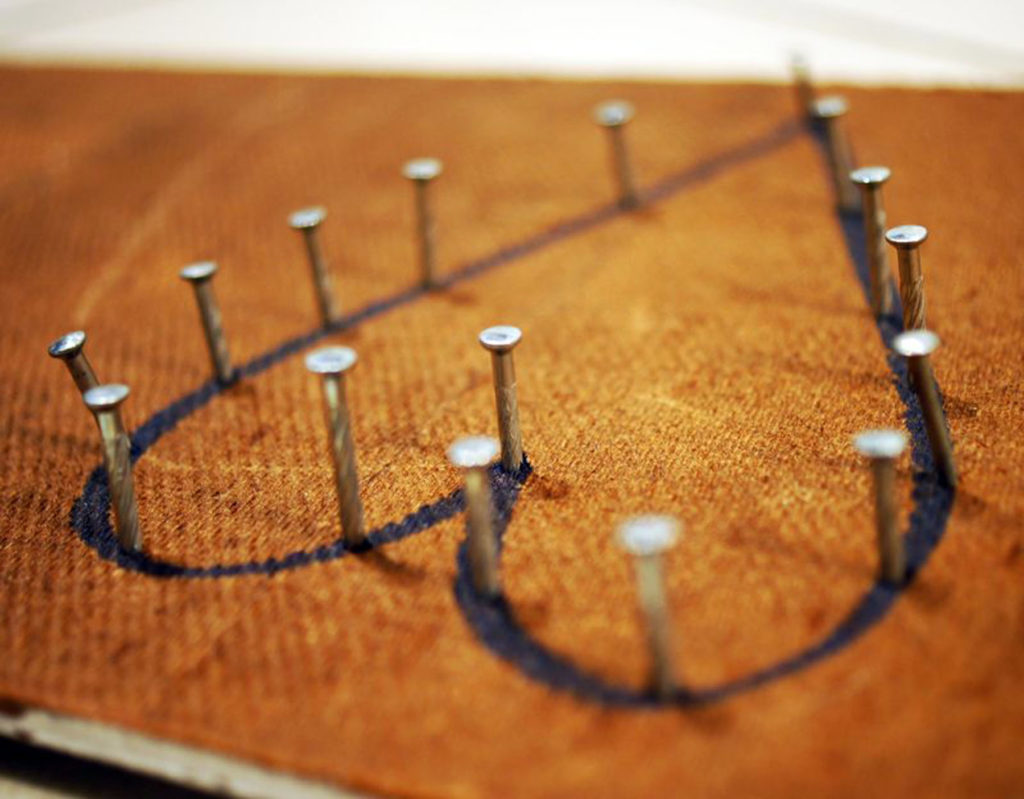
For the wire heart:
- Using the permanent marker, draw a heart freehand, or use one of the templates provided.
- Distribute nails evenly around the outline and hammer all the way through.
- Turn the board over with nail points facing up.
- Wrap the start of the wire around one of the nails.
- Begin winding the wire from one nail across the heart to another nail.
- Continue in a random pattern using all of the nails at least once and you have filled the center to your liking.
- Wrap the wire around each nail as you take it completely around the perimeter of the heart.
- When you get back to the starting point, measure off enough wire to wrap around the heart 1 ½ to 2 times. Cut the wire.
- Start working your way around the heart again, but this time wrap the wire around the wires that make up the outline. Try to include as many nearby wires as possible without changing the overall look. Give the wire a little tug to make it sturdy.
- Complete the entire perimeter wrapping at each space and each nail once.
- Tie a knot with the wire when you get back to the start and snip off the remainder with wire cutters.
- At a few points in the center use a small piece of wire to secure some of the crossed wires together for support.
- Gently slide the heart off of the nails.
- Using small pieces of wire, secure the heart by putting one end of the wire through the holes where the nails were and twisting them off. Snip excess wire.
- Tie a length of ribbon in the center of the top of the heart to hang.

