As you have seen from previous posts, I firmly believe that having the right tools makes all the difference. Your knives are no exception. What’s even more important with knives is understanding them and how they work. At the risk of sounding like a zen master, you must respect the knife.
Let’s start with the understanding. Here is a simple diagram of the major parts of the knife:
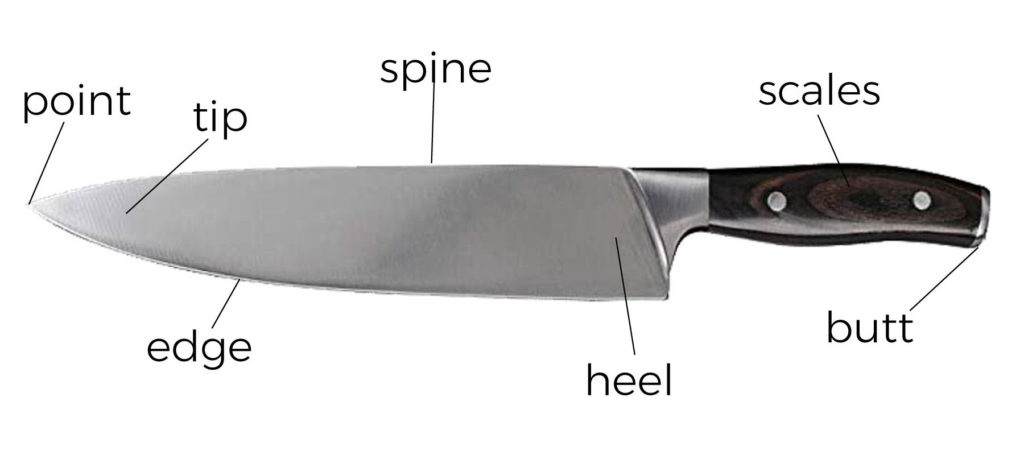
- Point – The primary function of this part of the knife is piercing.
- Tip – The forward-most quarter of the blade (including the point). It is primarily used for intricate cutting and cutting smaller or delicate foods.
- Edge – The part from point to heel which does the cutting. It produces the most results and must be maintained and sharpened for best results and safety.
- Spine – Top of the blade.
- Heel – Rear part of the edge. This part is used for cutting through large or tough foods.
- Scales – The part that makes up the grip of the knife.
- Butt – End of the knife.
Included in this post are very basic knife guidelines. Of course, there is much more information available. In a future post, we will cover cutting boards and specific cuts. If you have other ideas, comments, or questions please submit your comments. Until then… stay sharp ( I couldn’t resist).
savour… effective tools
As stated above, keeping your knives sharp is essential. Not only will it produce the best results, but it keeps you much safer in the kitchen. A sharp knife does the job more easily and prevents you from applying too much pressure and slipping.
There are a couple of tools you will need to get the most out of your knives. You can use either a sharpener (non-electric please) or stone. The other is a honing steel. These tools are available everywhere and will add years of usefulness to your knives.
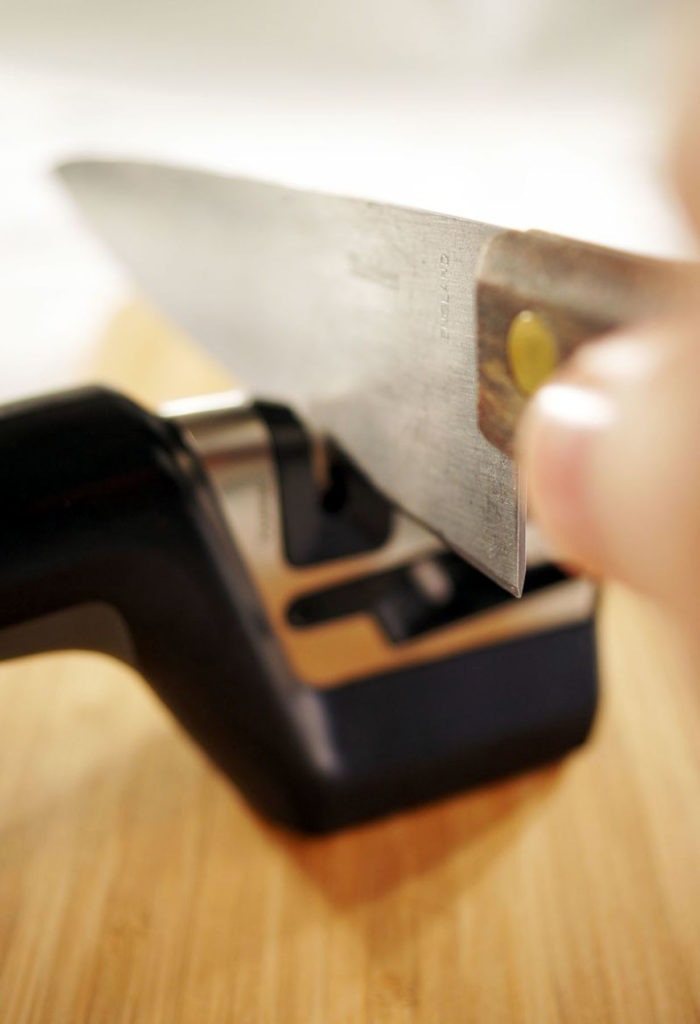
The sharpener:
- Place the sharpener on a flat surface such as your kitchen counter.
- Choose the appropriate slot for sharpening (most come with coarse and fine).
- Coarse is typically meant for straight edges only (no serrated knives) and excellent for very dull blades.
- Fine is meant for straight or serrated blades and those that are already sharp as a means of finishing the edge or honing.
- Insert the blade into the slot at a 90-degree angle.
- Beginning at the heel and working toward the point, apply moderate pressure and pull the knife all the way through.
- Complete several times until sharp always from heel to point (never back and forth).
The stone:
- Place the stone on a flat surface.
- Add a small amount of food-grade mineral oil to the stone.
- Hold the knife at an angle that is approximately 20 degrees to the stone.
- Beginning at the heel and working forward toward the point, apply moderate pressure, and slowly slide the knife all the way across the stone.
- You can repeat all of your passes on one side and then the other. It should usually take 5-7 passes on each side to get a good edge.
- Wipe off the knife (inside a folded paper towel, edge away from hand) before proceeding to the honing steel.
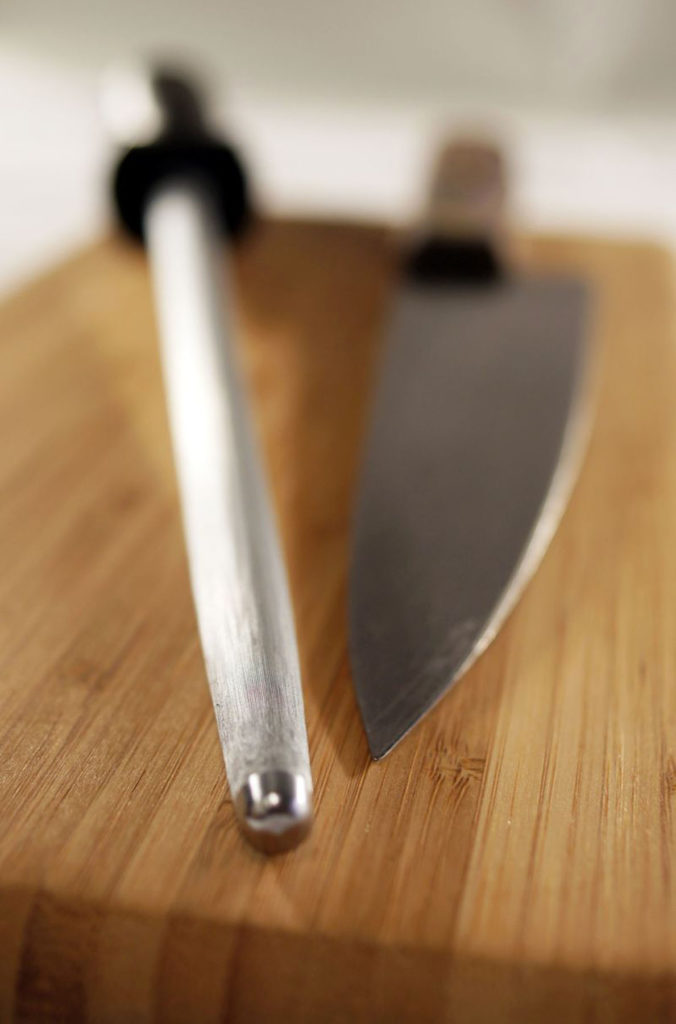
The honing steel:
- On a towel (to avoid slipping) on a flat surface stand the honing steel upright at a 90-degree angle.
- Hold the knife at an angle that is approximately 20 degrees to the steel.
- Beginning at the heel and working forward toward the point, apply moderate pressure and glide the knife over the steel.
- Because this process shores up the edge it is critical that you alternate sides with each pass. Neglecting to do this will cause the edge to curl and eventually snap off.
- Wipe off the knife (inside a folded paper towel, edge away from hand).
What kind of knife to use:
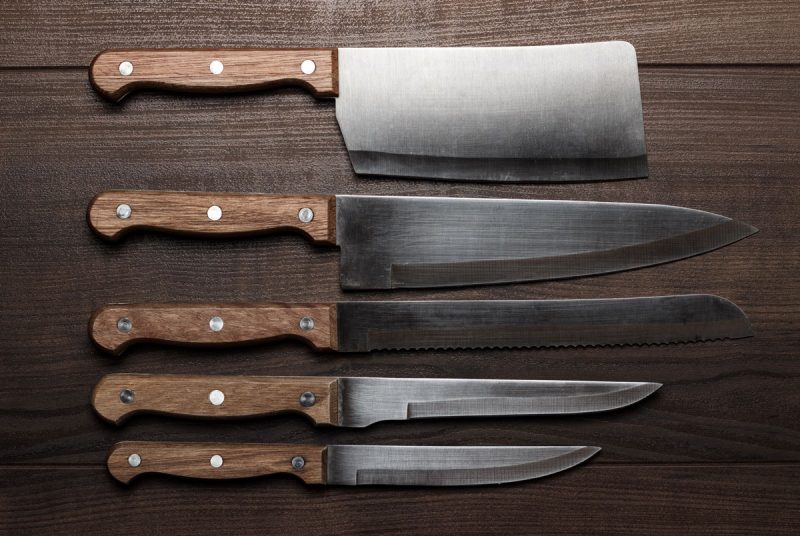
There are many kinds of knives. You can choose from boning, carving, utility, tomato, fillet, etc. Many have a very specific purpose. To make things a little simpler, I have narrowed it down to what you will most likely use in your kitchen within any given year. Here they are…
- The Chef’s Knife – This is the workhorse of the kitchen. It will do probably 85% – 90% of all kitchen knife jobs. You may wish to have a few of these on hand and keep them sharpened.
- The Paring Knife – This is smaller and designed for more intricate work. You will likely use is for peeling and making garnishes.
- The Bread Knife – This serrated knife is critical for cutting bread and useful for tomatoes and other delicate fruits/vegetables.
If all you owned was these three knives you could accomplish nearly everything that requires a knife in the kitchen. Knowing that you could purchase ones of a little better quality since you won’t be purchasing so many.
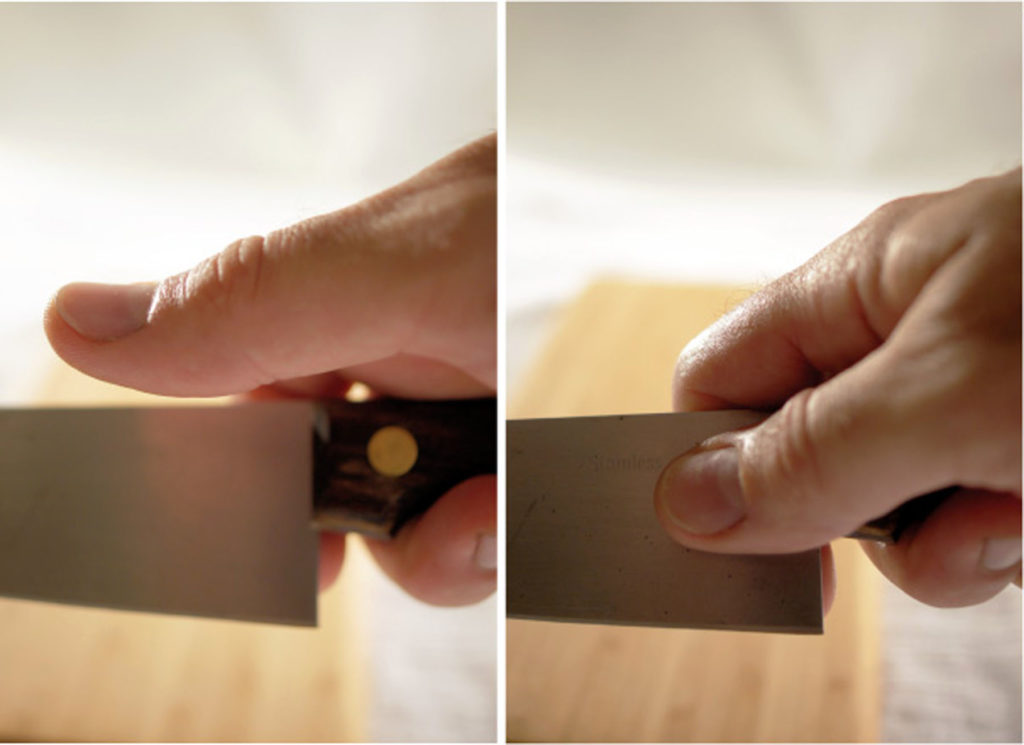
How to grip your knife:
This may seem like common knowledge to many, but surprisingly many people do not hold their knives properly. To gain the most control over your knife and have it perform more as an extension of your body you should follow these simple guidelines:
- Grab the knife in your hand with middle finger, ring finger, and pinky on the scales.
- Your index finger and thumb should sort of pinch the blade (see photos).
- Keep finger and thumb tip above the edge of the blade.
More things to consider:
Knives are typically manufactured with either wood or synthetic scales. It is fine to place the knives with synthetic scales in the dishwasher. However, over time the dishwasher will cause irreparable harm to the wooden scales. I recommend buying synthetic scaled knives.
There may be times that cutting with a paring knife is appropriate in your hand with proper experience. Otherwise, it is ill-advised to cut in your hand and should be forbidden for chef’s knives.
Do not sharpen knives too often. The sharpener or stone should only need to be utilized 3 or 4 times per year. The steel should be used every time you use the knife… every time.
Respecting the knife does not mean fearing the knife. Hold it like you mean it. As long as you use proper precautions and keep your fingertips clear of the edge of the blade you will be fine.
Speaking of that, always, always, always keep your fingertips curled under but holding the food to be cut. You should not be able to see the fingernails on the food holding hand.

